
Workspace guide
How to use IBridgeIt
This guide is for all customer users inside their workspaces. It walks through creating the workspace, signing in, and the everyday screens: settings, contacts, groups, channels, flows, triggers, add-ons, and billing.
About the platform
IBridgeIt is a messaging platform. You connect the channels your customers already use, keep your contact list in one place, and build the conversations that run across them without writing code. The same conversation can start on WhatsApp and continue over SMS, because the contact, not the channel, is what the platform is built around.
Everything belongs to a workspace. A workspace is an account boundary: its contacts, channels, flows, message history and invoices are its own, and nothing crosses between workspaces. A person can belong to more than one and switch between them from the menu.
The pieces, and how they fit
- Channels are the ways out. WhatsApp through us as an approved Meta provider, or SMS through your own operator link or SMS provider. A channel belongs to the workspace and carries the messages.
- Contacts are the people. Each one has addresses, called URNs, such as a phone number or an email, plus any custom fields you define. Groups are named sets of contacts, either chosen by hand or filled by a query.
- Flows are the conversations. A flow is a diagram of steps: send a message, wait for a reply, branch on the answer, call your systems, update the contact. You draw it rather than code it.
- Triggers are what start a flow: an inbound keyword, a schedule, joining a group, or a call to the API.
- Add-on services are capabilities your plan can include, such as OTP Delivery, Campaigns and Survey Capture. They appear in the menu only when your plan grants them.
- Billing covers what you pay: a monthly platform fee, and messages either bought up front or invoiced for what you used.
A typical setup
Most workspaces follow the same path. Connect a channel so there is a way to send. Import contacts, or let them arrive by messaging you. Build a flow, and try it in the simulator, which runs the flow against a test contact without sending anything real. Attach a trigger so the flow starts on its own. Then watch the runs, and adjust.
Nothing you build is locked in
Start here
A workspace is your team's home on IBridgeIt. Contacts, groups, channels, flows, and billing all belong to one workspace. When you sign in you land on the dashboard, which is a short overview of that workspace. The left menu is where the real work happens.
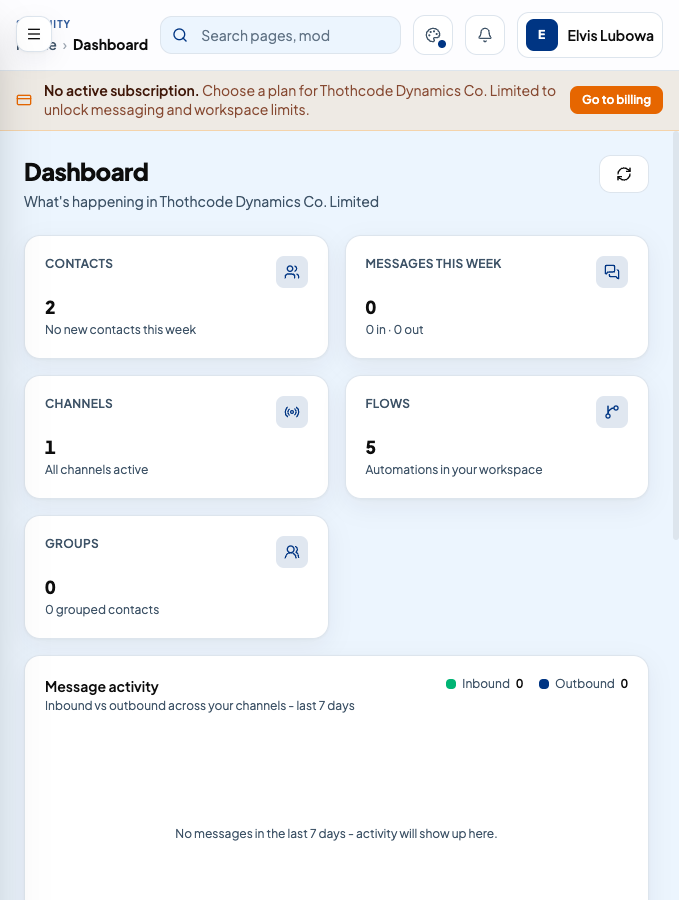
Two roles matter. A workspace admin can change settings, invite people, and open Billing and Subscription. A regular member can still work with contacts, groups, and channels when they have permission, and they can always open Security to manage their own authenticator.
The menu groups day-to-day messaging under Messaging: Contacts, Groups, and Channels. Add-on services appear in the same menu only when your plan includes them. Billing and Subscription sits under Administration and is visible to workspace admins.
Create a workspace
You create a workspace from the public registration page. Open Create account, or go straight to the register page. The form is split into who you are and the workspace you are opening.
- 1Open Create account from the home page, or go to the register page.
- 2Under About you, enter your first name, last name, and email. Last name can be left blank.
- 3Choose a password of at least 8 characters. The bar under the field turns green as you add an uppercase letter, a number, and a symbol.
- 4Under Your workspace, type the name people will see, such as your company or team name.
- 5Select your country. The country sets the dial code and the timezone. Billing still starts in US dollars, even if you pick a timezone far from the United States.
- 6Submit the form.
If email confirmation is required, stay on the page that asks you to verify your email. Open the message, confirm the address, then sign in. Until that happens, messaging and flows stay inactive.
If the workspace requires two-factor authentication, the next screen asks you to secure the account before you continue. Scan the code with an authenticator app and enter the digits it shows. After that you arrive on the dashboard as the workspace admin.
What gets created
Sign in
Open Sign in and enter the email and password you registered with. Tick Remember me if you want the browser to keep the session on this device. Choose Sign in.
Three things can happen next.
- You go straight to the dashboard.
- The page asks you to confirm your email first. Use the link in the message, then sign in again.
- The page asks for a two-factor code. Open your authenticator app and type the current code. If your workspace allows it, you can also ask for that code by email or WhatsApp.
Forgot the password
- 1On the sign-in page, choose Forgot password.
- 2Enter the email on the account and submit.
- 3Open the reset message and follow the link.
- 4Choose a new password and sign in with it.
If you already have an account and need another workspace, sign in first. Open the workspace switcher at the top of the sidebar and choose Create workspace. Each new workspace still starts in USD.
Settings
Open Settings in the left menu. Workspace admins see three pages in a small menu on the left of the settings screen: General, Security, and Audit log. Members who are not admins are taken to Security only. General and the audit log are for admins.
General
General is the workspace profile. The status badge at the top shows whether the workspace is active.
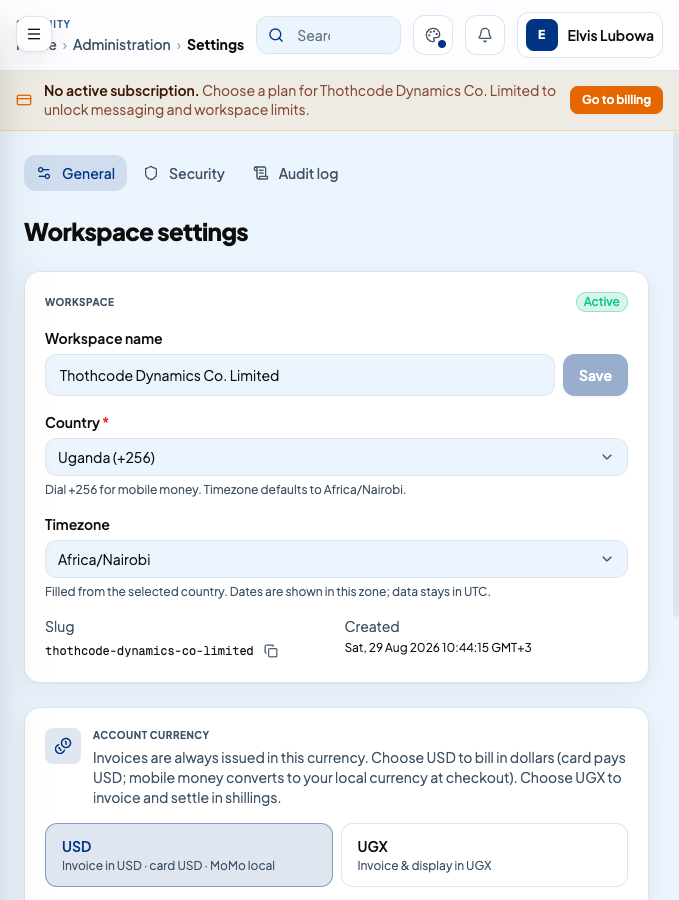
Workspace name, country, and timezone
The name is what your team sees. Country sets the dial code used for mobile money and suggests a timezone. Timezone controls how dates are shown to you. The stored times stay in UTC. If a country has more than one zone, pick the one that matches where the team works.
- 1Open Settings, then General.
- 2Change the workspace name, country, or timezone.
- 3Choose Save next to the name. The button stays off until something has changed, and a country is required.
Only a workspace admin can edit these fields. Members see them as read-only.
Slug and created date
The slug is the short permanent id of the workspace. Use the copy button if you need to share it. The created line is when the workspace was opened. Neither of these can be edited here.
Account currency
Invoices are issued in the currency you pick here. New workspaces start in USD.
- USD means invoices are in dollars. A card payment is charged in dollars. Mobile money is converted to your local currency at checkout.
- UGX means invoices and the prices you see are in Ugandan shillings. The page shows the current dollar rate the platform is using, and an example of what 100 dollars becomes. If no rate is set yet, ask a platform administrator to add one before you issue shilling invoices.
- 1On General, find Account currency.
- 2Choose USD or UGX.
- 3Choose Save currency. The button is available only after the choice differs from the saved one.
Two-factor and one-time codes
These switches apply to everyone in the workspace, not just you. Your own authenticator is on the Security page.
- Require 2FA for members. When this is on, every member must enroll an authenticator app before they can use the workspace. They enroll the next time they sign in. If the platform has mandated two-factor, the switch stays on and you cannot turn it off here.
- Allow email OTP delivery. When this is on, a member can ask for the current authenticator code by email during sign-in. The platform sends that mail. If the platform has turned email codes off, the switch stays disabled.
- Deliver login codes via WhatsApp for all members. When this is on, a member who has a phone number on their profile can receive the current authenticator code on WhatsApp during sign-in. They do not have to opt in one by one. This needs the OTP Delivery add-on, and the codes are counted against this workspace's subscription.
Team
The Team block is a shortcut to Members. Choose Manage members to invite teammates and set their roles. Inviting and role changes are recorded in the audit log.
Danger zone
A workspace user cannot deactivate the workspace from this page. Only a platform administrator can do that. If you need the workspace closed, contact them.
Security
Security is your personal authenticator. Every signed-in member can open it, including people who cannot see General.
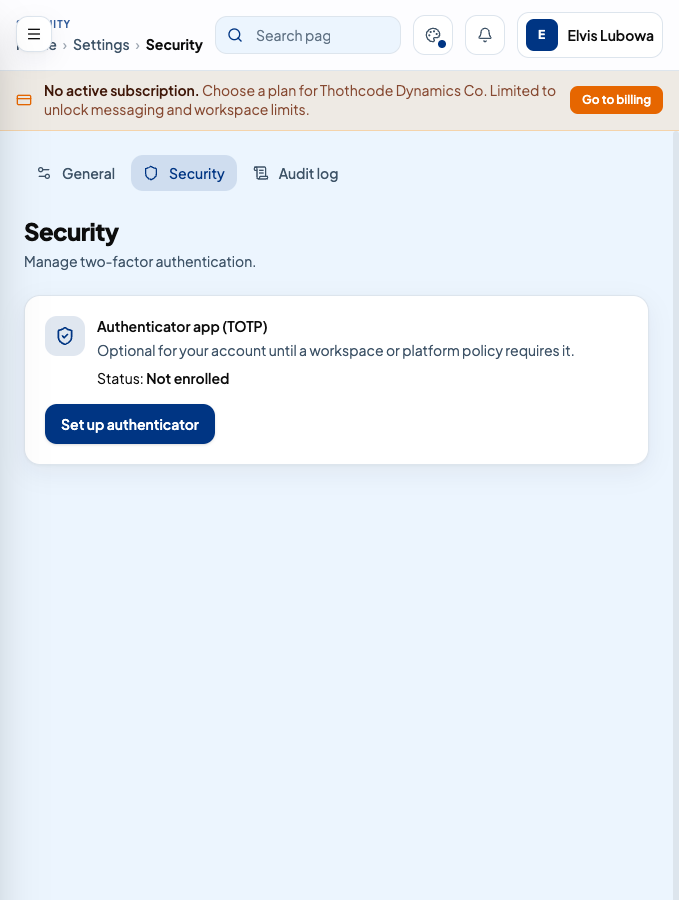
- 1Open Settings, then Security.
- 2If you do not have an authenticator yet, start setup. A QR code appears.
- 3Scan it with an authenticator app on your phone, or enter the setup key by hand.
- 4Type the current code from the app into Authentication code and confirm.
The code is usually 6 digits. Some setups use 8. The field tells you which length to type. After enrollment, sign-in will ask for a fresh code from the same app.
To replace a lost phone, choose reset and confirm. You will enroll a new authenticator before you can sign in again. Resetting removes the old device immediately, so do it only when you can finish setup.
Audit log
The audit log is a history of who did what in this workspace. Open Settings, then Audit log. The subtitle is "Who did what in this workspace". Only workspace admins can open it.
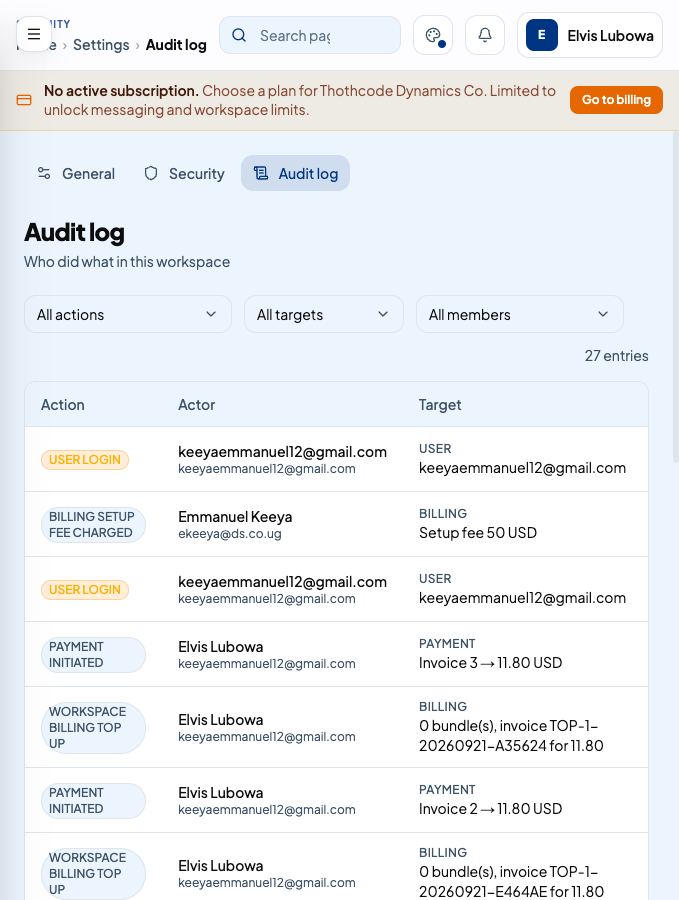
Each row is one event: the action, who did it, what it affected, and when. The list shows 25 rows at a time. Use the pager at the bottom for older events.
Three filters sit above the table. They apply as soon as you change them.
- Action. Examples include user login, member invited, role changed, workspace updated, contact created or deleted, contacts imported, group changes, channel changes, flow saved, and trigger changes.
- Target. Narrow the list to a user, the workspace, a contact, a group, a channel, a flow, a trigger, or a provider.
- Member. Show only what one person on the team did. The list is filled from the workspace members.
Leave a filter on "All" when you want the full history again. The log is for reading. You cannot edit or delete a row from this page.
Contacts
Contacts are the people you message. Open Messaging, then Contacts. You can search the table, and filter by status. Archived contacts stay hidden until you choose the Archived filter.
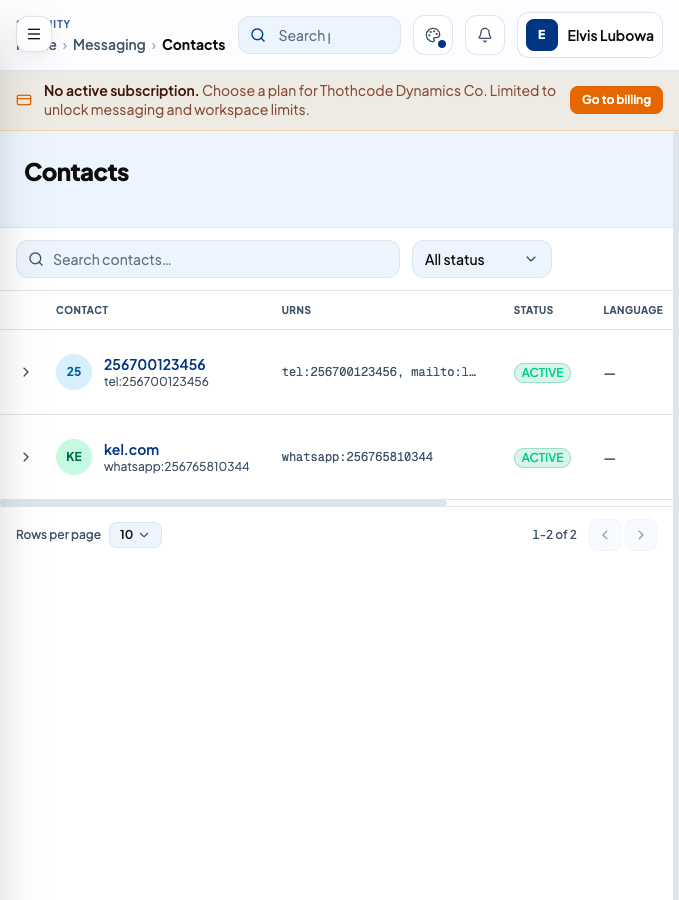
Create one contact
- 1On Contacts, choose New contact. You need permission to edit contacts, and the workspace must be inside its plan limits. If either is missing, the button stays off.
- 2Stay on Single contact.
- 3Enter a name. Language is optional, for example eng.
- 4Add at least one URN. A URN is how the platform reaches the person. Pick WhatsApp, Phone, Email, Telegram, or Facebook, then type the number or address. Choose Add URN if the same person is reachable more than one way.
- 5Custom attributes are optional. Add a label and a value, such as a customer number, when you want that detail stored on the contact.
- 6Choose Save contact. The contact is created as Active.
Only an Active contact can send or receive messages. On a later edit you can set the status to Blocked (no messages in or out), Stopped (they opted out), or Archived (hidden from the default list).
Import many contacts
- 1Choose New contact, then Bulk import.
- 2Upload a .xlsx, .xls, or .csv file, or drop it on the dashed area. Recognised columns are name, language, whatsapp, phone, email, facebook, and telegram. Any other column is saved as a custom attribute.
- 3Confirm the import. It runs in the background, so you can keep working. The audit log records a contacts imported event.
Edit, archive, and delete from the list
Each row has actions when you have permission. Edit opens the same form with the current name, language, status, and URNs. Archive hides the person from the default list. You can still find them with the Archived filter. Delete asks you to confirm, then removes the contact. That cannot be undone.
Open a contact
Choose a row to open the contact. The header shows the name and the actions you are allowed to use: edit, archive, and delete. Archive asks you to confirm because archived contacts disappear from the normal list. Delete asks you to confirm because it cannot be undone.
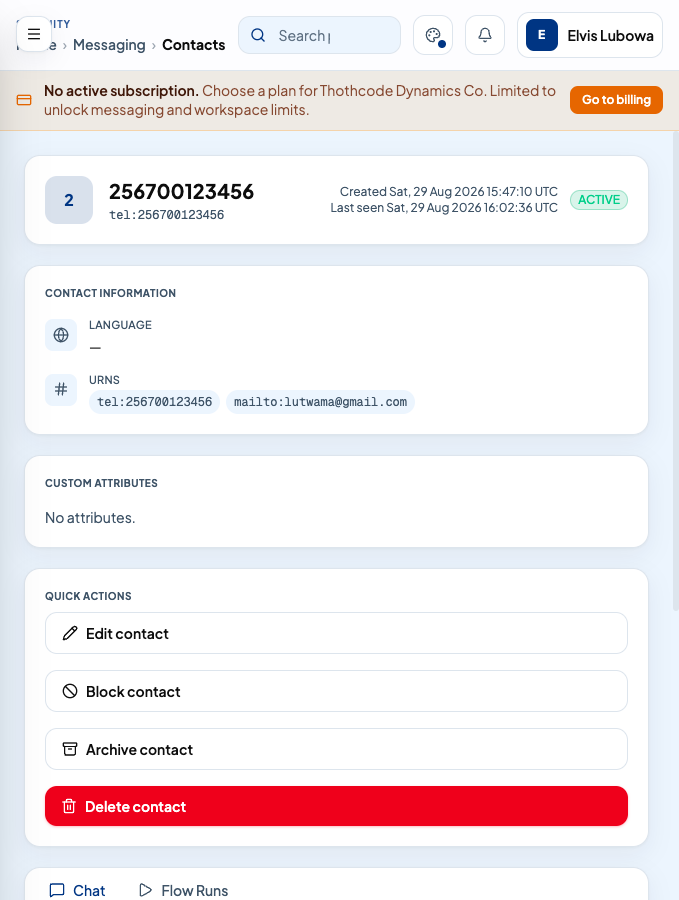
Two tabs sit on the contact:
- Chat. The conversation with this person. You can read what was sent and received. Use it when you need the thread itself, not a flow report.
- Flow runs. Every flow that has started for this contact. You can search and filter by status. If nothing has run yet, the tab says that flow runs will appear here.
Groups
A group is a named list of contacts. Campaigns and other sends use groups so you do not pick people one by one. Open Messaging, then Groups. Search matches the group name and the description.
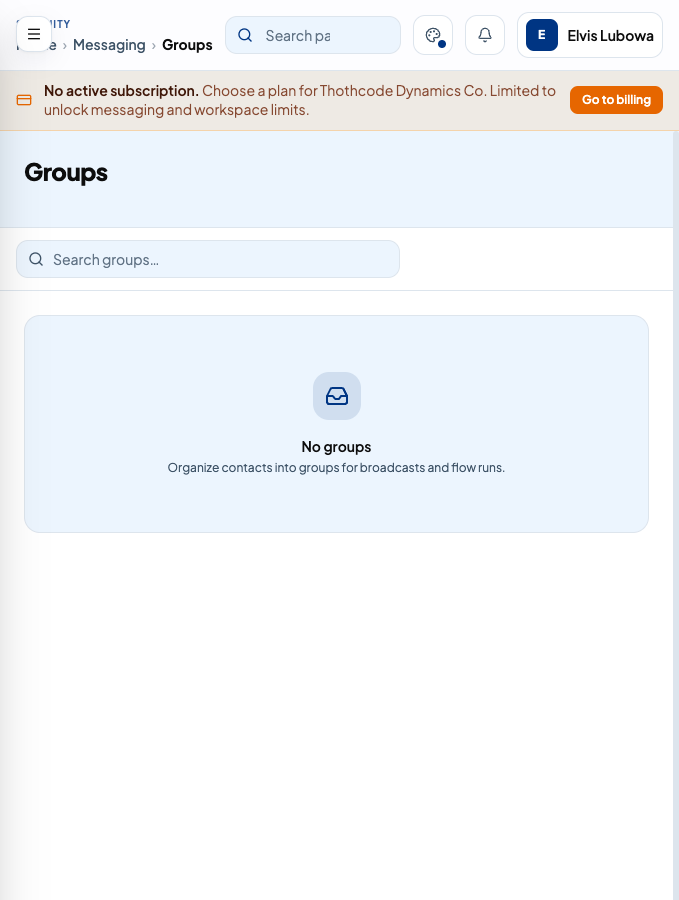
Create a group
- 1On Groups, choose New group. The button follows the same permission and plan-limit rules as contacts.
- 2Enter a name. A description is optional.
- 3Save. The group starts empty.
Add people, edit, and delete
From the groups list you can:
- Add contacts. Pick people who are not already in the group.
- Edit. Change the name or description.
- Delete. Confirm the dialog. Deleting the group does not delete the contacts themselves.
Open a group
Choose a group to see its details: name, description, when it was created, and the current members. From here you can edit the group, add more contacts, or remove one member. Removing a member takes them out of the group only. Their contact record stays. Delete group is also here, with a confirmation, when you have permission to delete groups.
Channels
A channel is a route messages travel on, such as a WhatsApp number or an SMS connection you bring yourself. Open Messaging, then Channels. You can search by name or address, and filter by type or by active and inactive.
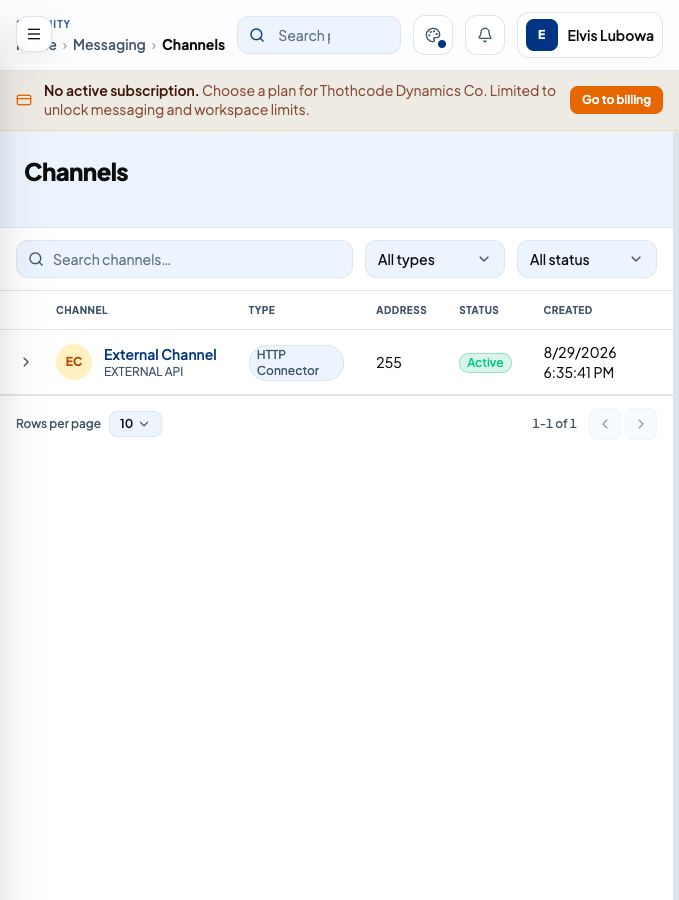
Create a channel
- 1On Channels, choose New channel.
- 2Pick the type. WhatsApp connects a WhatsApp Business Account through Meta. Jasmin SMS uses a Jasmin gateway. Generic SMS talks to an HTTP SMS provider using the settings you enter.
- 3Finish the steps for that type, then save.
WhatsApp has three steps: Channel type, Connect Meta, and Phone numbers.
- 1Choose WhatsApp, then Launch Meta signup. The button uses Meta's own sign-in so you grant access without pasting a token.
- 2In Meta's window, approve the WhatsApp Business Account you want this workspace to use.
- 3When you return, the account is attached to this workspace if it was not already attached somewhere else. Its templates are downloaded and mapped to the workspace, so flows and campaigns can use them. Its phone numbers are listed, but they are not channels yet.
- 4Select the numbers that should become channels, then confirm. Only the numbers you tick are created. You can connect another account later with the same button.
If Meta signup succeeds but the template download fails, the account can still be saved. Check the channel afterwards and sync again if templates are missing. An account that already belongs to another workspace is not moved.
SMS you bring yourself
Jasmin SMS and Generic SMS use two steps: Channel type, then Details. Enter the name and the connection settings your provider gave you. Those channels send through your own gateway. WhatsApp messages on a number you connected above are sent through IBridgeIt.
Open a channel
Choose a channel to see its name, type, address, whether it is active, and when it was created and updated. The right side has tabs:
- Outgoing Message Logs. Messages this channel sent, with search.
- Incoming Message Logs. Messages this channel received, with search.
- Metrics. Counts and delivery figures for the channel.
- Usage. How this channel is consuming the subscription.
- Connectors. Shown when the channel exposes an external send connector. You can see the connector and its rate limit. The rate limit is set by a platform administrator. A workspace can read it and cannot change it.
Channel connectors
A connector lets one of your own systems send a message out through a channel without anyone signing in to IBridgeIt. Your order system, your CRM, or your core banking application calls one URL, hands over a destination and a message, and the connector sends it on the channel it is attached to. It is send only. Replies from customers keep arriving the normal way, in the channel logs and on any flow you have triggered.
A connector belongs to exactly one channel, and a channel has at most one connector. Everything a connector sends is logged against that channel, counts towards your usage, and is billed at the same rates as any other message on it. There is no separate meter to watch.
Before you start
Set one up
- 1Open Messaging, then Channels, and choose the channel you want the connector on.
- 2Go to the Connectors tab and choose to create the connector.
- 3Optionally enter an IP allowlist. This is a comma separated list of addresses or ranges, for example 203.0.113.4, 198.51.100.0/24. A call from any other address is refused. Leave it blank to accept any source address.
- 4Optionally enter a status callback URL. This must be a public HTTPS address on your side. We POST delivery updates to it. Leave it blank if you do not want callbacks.
- 5Save. The token is shown once, in full, on the screen that follows. Copy it now and store it where your system keeps its secrets. We keep only a scrambled copy, so we cannot show it to you again.
- 6Copy the send URL from the same tab and give both the URL and the token to whoever is wiring up your system.
After that the tab shows the connector, a masked hint of the token so you can tell which one is in use, the allowlist, the callback URL, the rate limit, and when it was last used. From there you can edit the allowlist and the callback URL, disable the connector temporarily, rotate the token, or remove the connector altogether.
- Disable. The connector stops accepting calls straight away. Nothing else is lost, and enabling it again brings the same token back into service.
- Rotate. A new token is issued and shown once. The old token stops working immediately, so change your system first or plan for a short gap.
- Remove. The connector and its token are gone for good. The channel itself is untouched.
Keep the token safe
How your system calls it
The token goes on every call as a bearer token. GET the send URL to see what the channel can send. On a WhatsApp channel that returns the approved templates along with the values each one expects. On an SMS channel there are no templates, so the answer simply tells you the channel takes text.
curl -X POST "https://.../connect/v1/<channel-uuid>/send_message" \
  -H "Authorization: Bearer <your token>" \
  -H "Content-Type: application/json" \
  -d '{ "to": "+2567xxxxxxxx", "type": "text", "text": "Your order has shipped." }'
On a WhatsApp channel you can send free text, a file, or an approved template. Files are sent as a public link to the file itself, not uploaded, because WhatsApp fetches the link. On an SMS channel only text is accepted.
The call returns as soon as we have accepted the message. You get back a message id and a status of pending. We do not hold your request open while WhatsApp or the SMS provider works. Store that message id, because every later update refers to it. If your own system has a reference of its own, send it along and we will store it and repeat it back to you.
The 24 hour rule on WhatsApp
Delivery callbacks
If you set a callback URL we POST a small piece of JSON to it every time the status of one of your messages changes. The first one is usually sent or failed, then delivered, then read as the provider reports them. Match each one to your record using the message id we returned when you sent. When a message fails, the reason is included.
{
  "event": "message.status",
  "messageId": "6f1c9a2e-....",
  "externalMessageId": "order-4821",
  "to": "+2567xxxxxxxx",
  "status": "DELIVERED",
  "previousStatus": "SENT",
  "error": null,
  "timestamp": "2026-09-16T16:40:00Z"
}
Answer with a success response. If your endpoint is down or busy we retry for a while and then give up on that update. The URL has to be a public address. Addresses on your own machine or inside a private network are rejected when you save them.
Limits
Each connector has a ceiling on calls per minute so that a runaway loop on your side cannot flood the channel or your bill. Calls above it are refused with a too many requests response, and slowing down is enough to recover. The ceiling is a platform safety control. You can see the value in the Connectors tab, and a platform administrator sets it. The usual WhatsApp sending limits on your number still apply on top of it.
Flows
A flow is a conversation or a job you draw as a chain of steps. Open Automation, then Flows. Each flow belongs to this workspace. A run is one pass of that flow for one contact: it starts, waits when it needs a reply, and finishes when it reaches the end.
Choose New flow and pick a category. The category is a label for what you are building, such as a chatbot, a survey, a poll, a campaign, or an SMS conversation. It does not lock you out of node types. Name the flow, save it, and the editor opens. Drag a step onto the canvas, connect its exit to the next step, and save again. You can also export a flow as a file and import one into this workspace.
You start a run in three ways. A trigger starts it when a message arrives, or on a schedule. Enter another flow starts it from a flow that is already running. Opening a contact and looking at Flow runs shows what has already happened for that person.
Node types
A node is one step. The engine runs the types below. Add label, Send an email, and Open a ticket can appear in the editor, and the engine does not run them yet, so leave those cards out of a flow you expect to go live.
Send a message
Sends one message to the contact who is in this run, on the channel the run is using. Write the text in the box. Anything that starts with @ is filled in from the run before the message goes out, so Hello @context.contact.name becomes Hello and the person's name. You can attach a file, add quick replies, and on WhatsApp pick a template. The contact has to be Active, and they need an address the channel can reach. If either is missing, the step is skipped and the flow continues.
Wait for a response
The run pauses until the contact replies, or until the timeout you set. Each rule is a test on that reply, and each rule has its own exit, so you draw a different path for each answer. There is always an Other exit for a reply that matches none of the rules.
- Words and phrases: has any of these words, has all of these words, has the phrase, has only the phrase, starts with.
- Shape of the reply: has some text, has a number, has a number between two values, below, equal to, or above a value, has a date, has a time, has a phone number, has an email, matches a regular expression.
Give the wait a result name, short and in snake case, such as age or confirm. The reply is saved under that name. Later steps read it as @context.results.age.value. You can also save a reply that matched a rule onto a field on the contact. Timeout is in minutes. Leave it blank to wait with no limit. Retries say how many unmatched replies to ask again before the flow takes the Other exit. Zero means the first miss goes to Other.
Send a broadcast
Sends one message to many people from inside the flow: a group, chosen contacts, a list of addresses, or one personalised message per row of a spreadsheet. You pick the channel and the message, then send now or on a schedule (once, daily, weekly, or every few minutes, hours, or days). A spreadsheet column is available in that row's message as @{column_name}.
Update the contact
Writes one value onto the contact in this run. Choose what to write: name, language, timezone, status, or a custom field. The value can be plain text or an expression, so a survey can store the answer it just collected with @context.results.age.value. Status has to be a real contact status, such as Active, Blocked, Stopped, or Archived. A value that is not one of those is skipped. A test contact used by the simulator is never changed.
Add a URN, and groups
Add a URN stores another address on the contact, such as a phone number or an email. The value can be an expression. Add to a group and Remove from a group put the contact in a group you already have, or take them out. Campaigns and scheduled triggers use those groups as their audience.
Enter another flow
Starts a second flow for the same contact and waits. The first flow is parked until the second one finishes, then it continues from the Completed exit. The second flow can read what the first one saved with @context.parent.results, and after it finishes the first flow can read the second one with @context.child.results. You can nest this up to five flows deep. A loop, a missing flow, or a run with no contact skips the step and continues on the default exit so the run does not sit there forever.
Nested flows
Enter another flow lets one flow call another, so you can build a piece once and reuse it. A know-your-customer check, a language chooser, an address capture: write it as its own flow, then call it from everywhere it is needed. The caller is the parent, the flow it calls is the child.
What happens when the step runs
- 1The parent run is parked. It stops where it is and keeps its place.
- 2A child run starts for the same contact, on the same channel, with a snapshot of the parent attached.
- 3The child runs to the end on its own.
- 4The parent wakes up and leaves the step through its Completed exit, now able to read what the child saved.
If the enter_flow step has no exit drawn after it, the parent simply completes when the child finishes, rather than hanging.
Reading across the boundary
The child can look up at the flow that called it, and the parent can look down at the flow it called once that flow is done.
- From the child: @context.parent.results.age.value reads a result the parent saved, and @context.parent.run.uuid or @context.parent.flow.name identify the caller.
- From the child, further up: @context.parent.parent reaches the grandparent, and so on up the chain.
- From the parent, after the child ends: @context.child.results.score.value and @context.child.status.
Nothing is shared by accident. The child does not inherit the parent's results into its own results; it reads them through parent, which keeps the two sets of answers separate and means a child flow behaves the same whoever calls it.
What the child gets is a snapshot taken at the moment it started: the parent's results as they stood, the parent's run and flow, and the parent's own parent snapshot embedded inside it, which is what makes parent.parent work all the way up. It is a copy, not a live link. If the parent saves something after the child started, the child will not see it. Collect what the child needs before the Enter another flow step, not after it.
Coming back the other way, the snapshot the parent gets carries the whole subtree underneath the child, so a child that itself called a flow is readable too: @context.child.results is that child, and @context.child.child.results is the flow it called.
Building menus and payloads across the boundary
This is where nesting earns its keep. A child flow can compute from the parent's data exactly as if it were its own, so the expensive part, such as a webhook that lists accounts or students, is done once in the parent and every child that needs it reads the result rather than calling again.
A parent calls a webhook and saves it as parent_lookup. A reusable child flow named Pick a student builds the menu straight off that snapshot:
@(join(foreach(@context.parent.results.parent_lookup.value.body.students,
  (item, index) -> index + 1 & "). " & item.fullName & " - " & item.school.name),
  "\n"))
The child waits for a number, saves it as choice, and stores the id it resolved under a clear result name so the parent can pick it up:
@context.parent.results.parent_lookup.value.body.students[@context.results.choice.value - 1].idWhen the child ends, the parent continues from its Completed exit and builds its request body from both sides at once. Its own answers come from results, the child's from child:
@(json(object(
  "student_id", context.child.results.student_id.value,
  "term", context.results.term.value,
  "amount", number(context.results.amount.value),
  "paid_by", context.contact.urn,
  "completed", context.child.status = "completed"
)))
The same shape works for anything reusable: a language chooser that writes lang, an address capture that writes district and village, a know-your-customer check that writes verified. Each one reads what it needs through parent and hands back one or two clearly named results, and the caller assembles the final payload.
Name the results you hand back
The guards, and why a run never gets stuck
A nested flow is the easiest place to build an accidental loop, so the engine refuses a few things outright. In every case below the step is skipped and the parent carries on through its default exit, so a run never sits there waiting for something that will not happen.
- Nesting deeper than five. A flow may call a flow that calls a flow, up to five levels. The sixth is refused.
- A cycle. If the flow you are calling is already somewhere on the chain above you, it is refused, so A calling B calling A cannot happen.
- A missing flow, or no flow chosen on the step at all.
- A run with no contact. Subflows act on a person, so a run without one cannot use them.
Keep child flows small and single-purpose
Call a webhook
Call a webhook sends an HTTP request to a service you run, then keeps the response so the rest of the flow can use it. The URL has to be a public http or https address. Addresses that point at this platform, or at a private network, are blocked.
Every part of the request can be dynamic
This is the point that makes the step powerful. It is not only the body that goes through the expression language. Every piece of text you type into this node is evaluated against the run before the call goes out, so almost any API can be reached with the values this conversation has already collected.
- The URL, including the path. Put an id the customer just chose straight into the address rather than into the body.
- Every query parameter, name and value. Wrap anything a person typed in url_encode.
- Every header value, so a partner-specific header or a trace id can come from the run.
- The bearer token, the basic auth username and password, and the API key value. A token you fetched with an earlier webhook can be used by the next one.
- The body, for the methods that send one.
https://api.example.com/schools/@(context.results.lookup.value.body.schoolId)/invoices?msisdn=@(url_encode(context.contact.urn))So one flow can call a different endpoint per customer, sign each call with a token it obtained a step earlier, and pass a menu choice in the path. Chaining two webhooks, the first to authenticate and the second to act, is a normal pattern and needs nothing outside this node.
The request
On the Request tab, pick the method (GET, POST, PUT, PATCH, or DELETE) and the URL.
Authorization is optional. None sends the request as it is. Bearer token puts the token on the Authorization header. Basic auth sends a username and password. API key adds a named key either as a header or as a query parameter.
HTTP Headers is a list of name and value pairs. Accept is filled in as application/json. Add any others your server expects.
The body tab (POST, PUT, and PATCH) is where you build the JSON. GET, DELETE, and HEAD do not send a body. Use query parameters for those. The body is evaluated as an expression, and if the result is valid JSON it is sent as JSON. If it is not valid JSON, it is sent as plain text. The reliable way to build the body is the json and object functions, described under Building JSON.
What comes back
The node has two exits. Success is HTTP 200 or 201. Anything else, including a connection error or a blocked URL, takes Failure. Draw a path from each exit.
Give the call a result name, such as lookup. The response is saved under that name for every later step. The body is parsed as JSON when it is JSON, so you can walk into fields:
@context.results.lookup.value.status
@context.results.lookup.value.body.balance
@context.results.lookup.value.body.items[0].name
status is the HTTP status code. body is the parsed response. success is true only for 200 and 201. A list is read with a number in square brackets, starting at 0. A key that has a space or starts with a number is read the same way, with the key in quotes: @context.results.lookup.value.body["item one"]. The number in the brackets can be another expression, so a menu choice the contact just typed can pick a row:
@context.results.lookup.value.body.items[@context.results.choice.value].nameExpressions
An expression is a small formula you drop into a message, a contact field, a webhook URL, a header, or a JSON body. The engine replaces it with a value from this run before the step does its work. If the name does not exist, you get an empty string, not an error that stops the flow.
Referring to the run
Write @context, then a dot, then where to look. These are the roots:
- contact. The person in this run. name, first_name, language, status, urn, and urns. A custom field is fields.customer_number, or the short form @{customer_number}.
- results. Something a wait or a webhook saved. results.age.value is the text they replied. results.lookup.value.body.balance is a field from a webhook you named lookup.
- run. This run. run.uuid, run.status, run.flow.name, run.flow.uuid.
- parent. The flow that called this one with Enter another flow. parent.results.age.value. parent.parent reaches the flow above that.
- child. The flow this one called, once that flow has finished. child.results.score.value and child.status.
- node.uuid. The step that is running right now.
In a message you write the reference on its own: Hello @context.contact.name. Inside a function, the same path works with or without the leading @, so @(upper(context.contact.name)) and @(upper(@context.contact.name)) both become the name in capitals. A spreadsheet column on a broadcast, and a custom field, use braces: @{first_name}. If a row and a contact field share a name, the row wins. Write @@ when you need a real @ sign in the text.
Functions
A function call is @(name(arguments)) or @name(arguments). Text in an argument sits in quotes. These are the ones you will use most.
- Text. upper, lower, title, trim, text_length, text_slice, split, join, replace, word, word_count, field, url_encode, regex_match.
- Numbers. abs, round, round_up, round_down, min, max, mean, sum, mod, number, percent, format_number, rand_between.
- Dates. today(), now(), date, datetime, format_date, format_datetime, datetime_add, datetime_diff, epoch, datetime_from_epoch. Units for add and diff are Y, M, D, H, MI, and S.
- Choices. if(test, when_true, when_false), and, or, default(value, fallback), boolean.
- Lists. array, count, contains, sort, unique, concat, reverse, filter, foreach.
- Objects and JSON. object, keys, extract, json, parse_json. These are how you build a request body.
default uses the second value when the first is missing or empty, which is how you keep a message readable when a field was never set:
Hello @(default(context.contact.name, "there"))if picks one value or the other. A number comparison uses =, !=, >, >=, <, and <=. Text comparison ignores case.
@(if(context.results.age.value >= 18, "adult", "minor"))join, and building a menu from a webhook response
join is the function that turns a list into something a person can read. It takes a list and a separator and gives back one piece of text. Its partner is foreach, which builds that list by running the same small expression over every item. Together they are how a response from your own system becomes a numbered menu, without the flow knowing in advance how many rows there will be.
Here is a real one. A webhook saved as parent_lookup has returned a list of students, and a parent needs to pick one:
@(join(foreach(@context.results.parent_lookup.value.body.students,
  (item, index) -> index + 1 & "). " & item.fullName & " " & item.className & " - " & item.school.name),
  "\n"))
Read it from the inside out. The path is the list of students from the response. foreach walks it and hands each row to your own small expression as item, with its position as index. index + 1 makes the numbering start at 1 rather than 0, and the ampersands glue the rest of the line together. foreach gives back a list of finished lines, and join sticks those together with a line break between them. The contact receives:
1). Jane Doe P5 - Kampala Primary School
2). Amina Okello P3 - Kampala Primary School
3). Peter Mwangi S2 - Nakawa Secondary School
Wait for the reply with a has a number rule, saved as choice, then read the row straight back out of the response you already have. The reply is a position, so take one off it. No second call to your system is needed:
@context.results.parent_lookup.value.body.students[@context.results.choice.value - 1].fullNameThe same pair works on anything a list comes back as: branches, accounts, invoices, appointment slots. Wrap the list in filter first when some rows should not be offered, and the numbering still comes out right.
The full reference
Function reference
The list above covers the everyday ones. These also exist, and are worth knowing about because they solve problems that are awkward otherwise.
Generating values
- uuid() gives a fresh random identifier, useful as an idempotency key on a webhook so a retry is not treated as a second request.
- transaction_ref() gives a short readable reference such as TX-M8F2K1-7QB4ZR. Pass a prefix to brand it: transaction_ref("PAY") gives PAY-M8F2K1-7QB4ZR. The prefix is upper-cased and anything that is not a letter or digit is dropped.
@(json(object(
  "reference", transaction_ref("PAY"),
  "idempotency_key", uuid(),
  "amount", context.results.amount.value
)))
Checking for failure
When a step cannot produce a value it leaves an error value rather than stopping the flow. is_error tells you whether that happened, so you can send a different message instead of showing the customer something broken.
@(if(is_error(context.results.lookup.value), "We could not reach the system, please try later", context.results.lookup.value.body.balance))More text handling
- text(value) forces anything to text, which is how you stop a number being written into JSON as a number.
- clean(value) strips characters that are not plain printable text and trims the result. Useful on anything a person typed or a spreadsheet supplied.
- trim_left(value) and trim_right(value) trim only one end.
- remove_first_word(value) drops the first word, which is how you read the rest of a keyword message: the trigger word out, the argument left behind.
- repeat(value, times) repeats text, for example repeat("*", 4) to mask a value.
- char(number) gives the character for a code, and code(text) gives the code of the first character.
word and field both pull a piece out of text, and both accept a negative index to count from the end. word splits on spaces; field splits on a separator you choose, so field(context.results.ref.value, 1, "/") takes the second part of a value separated by slashes.
Reshaping lists from a webhook
extract_object takes a list of objects and keeps only the fields you name, which is the quickest way to cut a large response down before passing it on. foreach_value walks an object rather than a list, giving you each value, with the key available as the index.
@(json(extract_object(context.results.lookup.value.body.accounts, "id", "balance")))For the complete list, with a signature, a worked example, and the value each one gives back, open the Programming reference in a new tab.
Building JSON
A webhook body is text until you tell the engine to build an object. If you paste a JSON document and drop @context.contact.name into a string, a name that contains a quote or a newline will break the JSON. object and json avoid that. object builds a value. json turns that value into text the server can parse. The webhook step then sends that text as JSON.
object takes pairs: a key, then a value, then another key, then another value. Keys are quoted. Values can be plain text, numbers, booleans, other objects, lists, or anything you can read from the run.
@(json(object(
  "name", context.contact.name,
  "phone", context.contact.urn,
  "age", context.results.age.value,
  "adult", context.results.age.value >= 18,
  "asked_at", now()
)))
That leaves the server with a real object. name and phone are strings. age stays whatever the reply was. adult is true or false. asked_at is the time the step ran. Quotes inside the name are escaped for you.
Nest object when the server expects an object inside an object, and array when it expects a list:
@(json(object(
  "contact", object(
    "uuid", context.contact.uuid,
    "name", context.contact.name
  ),
  "answers", array(
    context.results.age.value,
    context.results.city.value
  ),
  "source", context.run.flow.name
)))
You can pass a webhook response straight back out. After a call named lookup, a later webhook can forward one field, or the whole body:
@(json(object(
  "balance", context.results.lookup.value.body.balance,
  "raw", context.results.lookup.value.body
)))
parse_json does the reverse when some earlier step left you a JSON string and you need to read a field out of it: @(extract(parse_json(context.results.note.value), "balance")). foreach walks a list and builds a new one, which is how you reshape an array from a webhook before you send it on. filter keeps the rows that match. Both stop at a few hundred items, which is enough for a payload and not a data export.
Triggers
A trigger is the rule that starts a flow. Open Automation, then Triggers. Choose New trigger, pick the kind, then choose which flow to start. A trigger can be limited to one channel. Leave the channel empty and it listens on every channel in the workspace. Include groups means the contact must be in at least one of those groups. Exclude groups means a contact in any of those groups never starts this trigger. Priority is a number. A higher number is checked first. If two triggers could both match, the higher priority wins.
Keyword
The first word of the incoming message must be the keyword. Join us matches a keyword of join. The rest of the message is ignored for the match, so join please still starts the flow. A keyword cannot contain a space. Matching ignores case unless you turn case sensitive on.
Pattern
The message is tested against a regular expression, on the whole text, not just the first word. Use this when a keyword is not enough, for example a message that contains an account number anywhere in the sentence. An invalid pattern never matches.
Catch-all
Any non-empty message starts the flow, once no higher-priority keyword or pattern on that channel has already matched. This is the fallback, such as a menu for people who write something you did not list.
Schedule
A schedule does not listen to messages. It starts the flow at a date and time for the contacts you pick: everyone in the include groups, plus any contacts you add by name. Repeat is never, daily, weekly, or monthly. Never runs once. The others keep starting a new run on that cadence until you turn the trigger off.
Add-on services
Add-ons are extra products your plan can include. They show up in the left menu only after the workspace is entitled to them, either because the subscription includes them or because a platform administrator granted them. If you do not see an add-on, it is not on this workspace yet. Ask the person who manages the plan.
OTP Delivery
OTP Delivery lets your own systems ask IBridgeItto send a one-time code over WhatsApp or SMS. Each accepted send is counted on this workspace's subscription. The same add-on is what Settings uses when you turn on WhatsApp login codes for members. Without it, that switch cannot deliver codes.
Open Add-on Services, then OTP Delivery. The page starts with a short stats strip, then three tabs: Configuration, API keys, and Integration. If the plan does not include the add-on, the page says it is not available and you cannot open those tabs.
Configuration
Configuration is where you choose how codes go out.
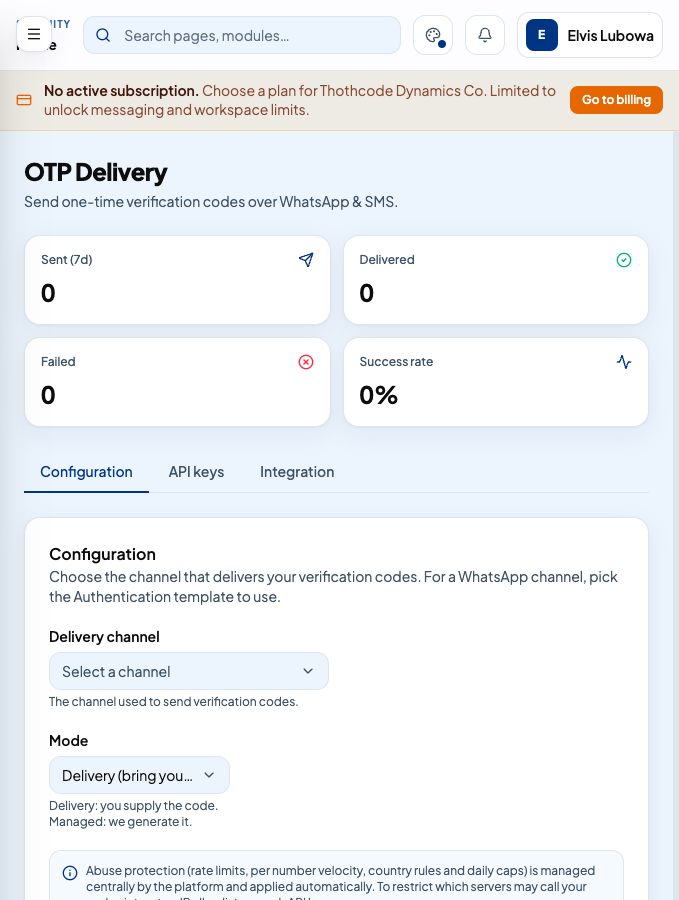
- Delivery channel. The channel that actually sends the code. Pick one of the channels already connected to this workspace.
- Authentication template. The approved WhatsApp template used when the channel is WhatsApp. SMS channels send the code as a text message instead.
- Mode. Delivery means your system supplies the code and the platform only sends it. Managed means the platform generates the code for you.
- Code length. How many digits a Managed code has.
- Code lifetime (seconds). How long a Managed code stays valid.
- 1Open OTP Delivery and stay on Configuration.
- 2Choose the delivery channel.
- 3If that channel is WhatsApp, choose the authentication template.
- 4Choose Delivery or Managed. For Managed, set the code length and lifetime.
- 5Save. New send requests use this setup.
API keys
Your systems authenticate with an API key. The secret is shown once, when you create or rotate the key. Store it then. The list afterwards shows the label, not the secret.
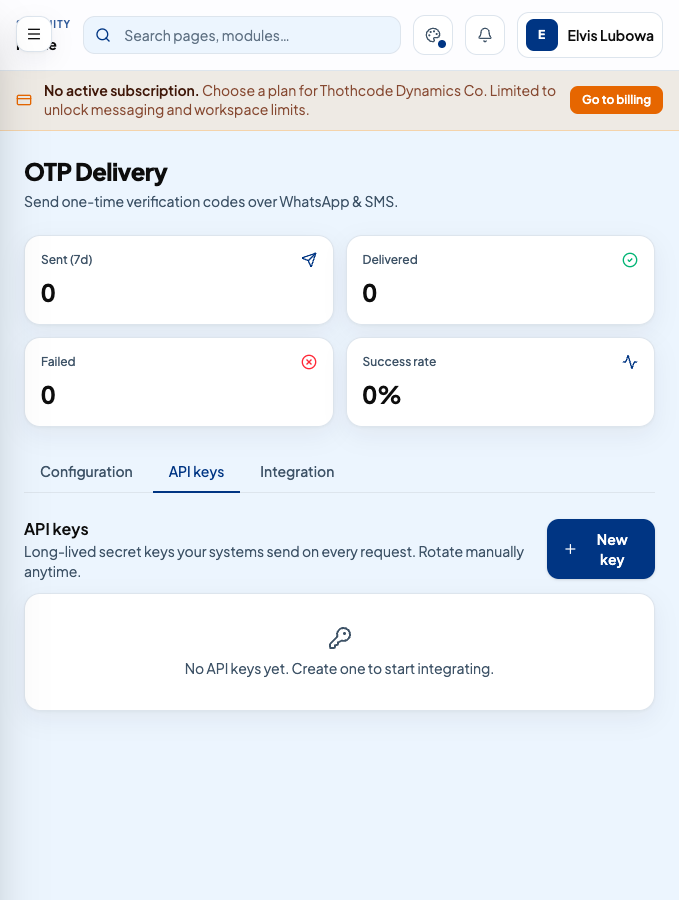
- 1Open the API keys tab and choose New API key.
- 2Give it a label you will recognise, such as Production backend.
- 3IP allowlist is optional. Enter comma-separated addresses or ranges if the key should only work from those sources. Leave it blank to allow any source.
- 4Rate limit per minute is optional. Leave it blank to use the default.
- 5Expires in (days) is optional. Leave it blank if the key should not expire.
- 6Create the key and copy the secret from the dialog before you close it.
On an existing key you can:
- Edit the label, the IP allowlist, and the rate limit.
- Rotate. The old secret stops working and a new secret is shown once.
- Revoke. The key can no longer send codes. This does not delete the history of sends it already made.
Integration
The Integration tab is the reference for the people wiring the key into your backend. It shows the endpoint, the header the key goes in, and a sample request. Requests are limited per key, and a key with an allowlist rejects calls from other addresses.
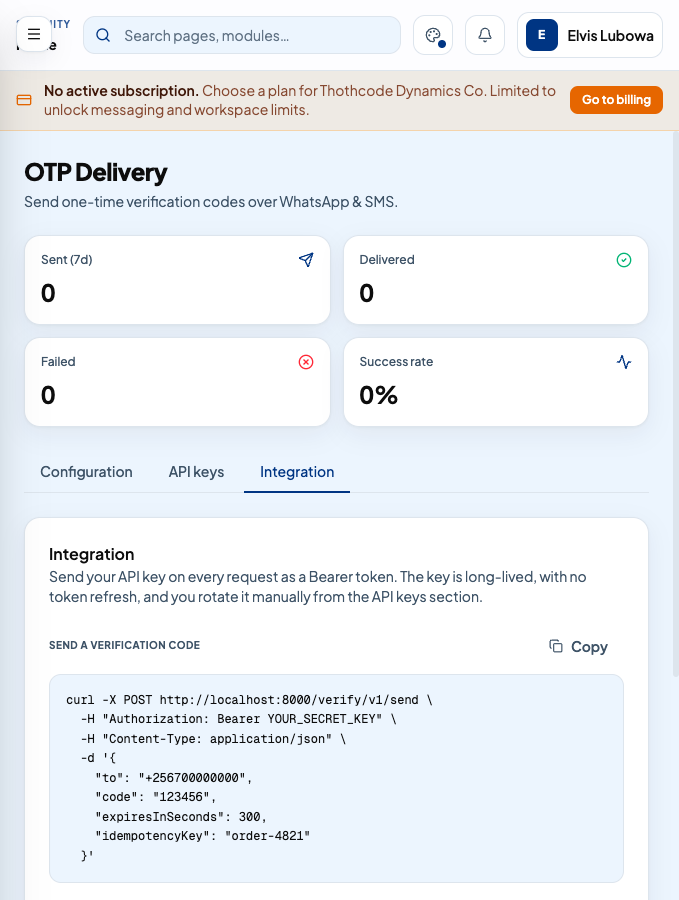
Use Delivery mode when your application already created the code and only needs it delivered. Use Managed mode when you want the platform to create the code, send it, and later check what the customer typed.
Campaigns
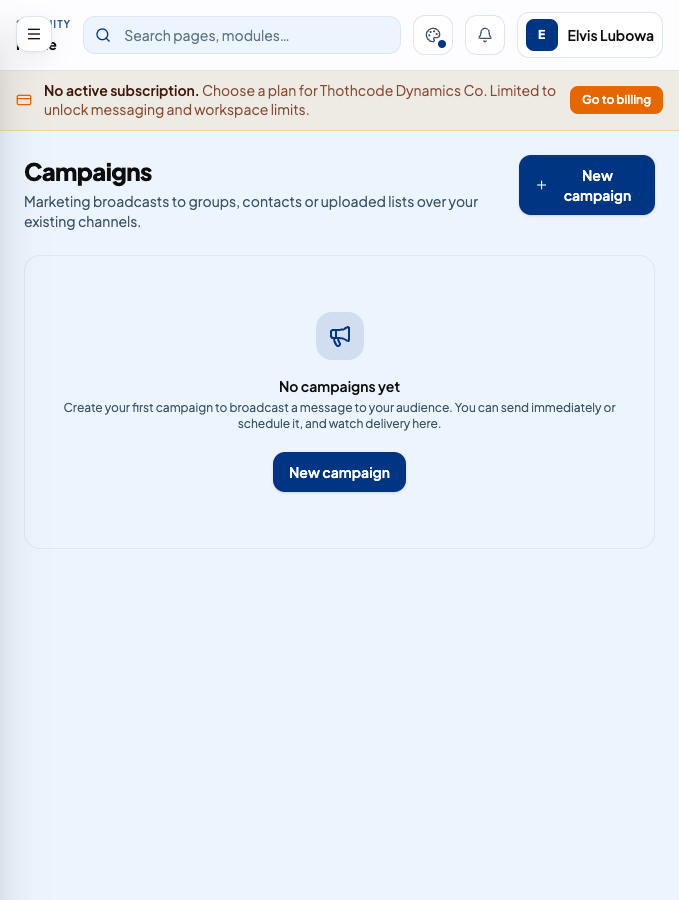
Campaigns send one message to many people over a channel you already have. Open Add-on Services, then Campaigns. The list shows each campaign and its status: preparing, scheduled, active, paused, completed, or cancelled.
Create a campaign
- 1Choose New campaign.
- 2Name it, then choose who receives it: a group, selected contacts, or an uploaded list.
- 3Pick the channel, then the template or message that channel should send.
- 4Send it now, or set a time so it stays scheduled until then.
- 5Save. The new campaign opens so you can watch it.
While it is running
From the list, or from the campaign itself, you can:
- Stop a campaign that is still sending. That pauses it.
- Cancel a campaign that should not continue. Confirm the dialog.
- Delete a campaign that has not finished. Completed campaigns stay in the list and cannot be deleted.
- Open the campaign to see delivery for each recipient. A campaign that repeats keeps a history of each occurrence.
Survey Capture
Survey Capture runs a questionnaire over your channels and keeps every answer with the contact who gave it. Open Add-on Services, then Survey Capture. Each survey is Draft, Open, Paused, or Closed.
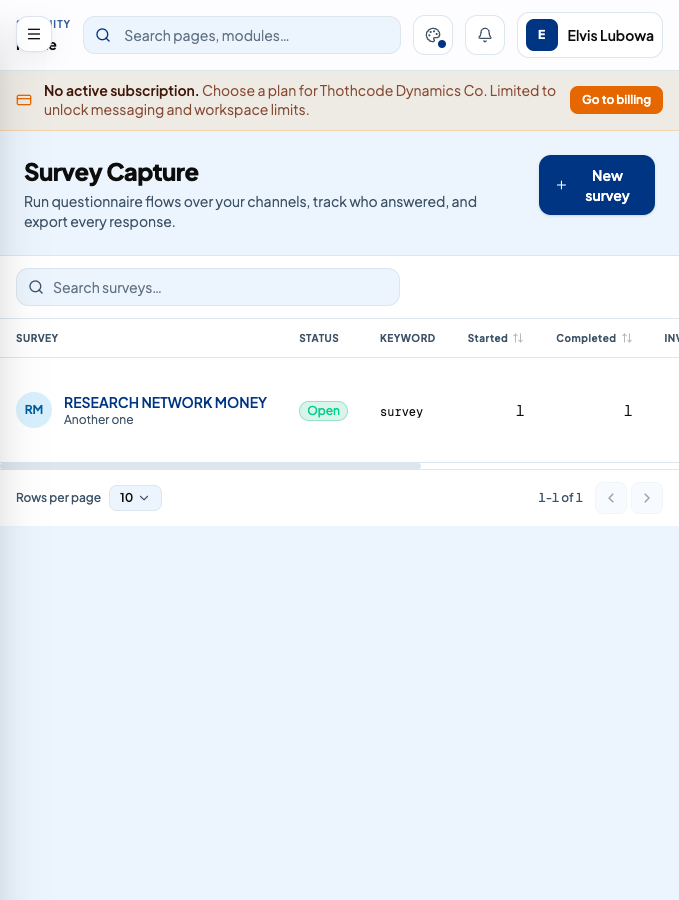
Create and run a survey
- 1Choose New survey and give it a name.
- 2Build the questionnaire. The questions are a flow the contact walks through on the channel.
- 3Open the survey when you want people to start answering. A draft does not accept responses.
- 4Pause it if you need to stop new answers without closing it. Open it again when you are ready.
- 5Close it when the survey is finished. Closed surveys keep their answers and do not take new ones.
Read the answers
- 1Choose the survey in the list.
- 2Review who has taken part and the status of each response.
- 3Export the spreadsheet. Each row is one response, with the answers and the contact details that were captured.
You can delete a survey you no longer need. Deleting removes that survey's record. Export first if you still want the spreadsheet.
Billing and subscription
Billing and Subscription is for workspace admins. Open it from Administration in the left menu. The page has two tabs: Subscription, and Invoices.
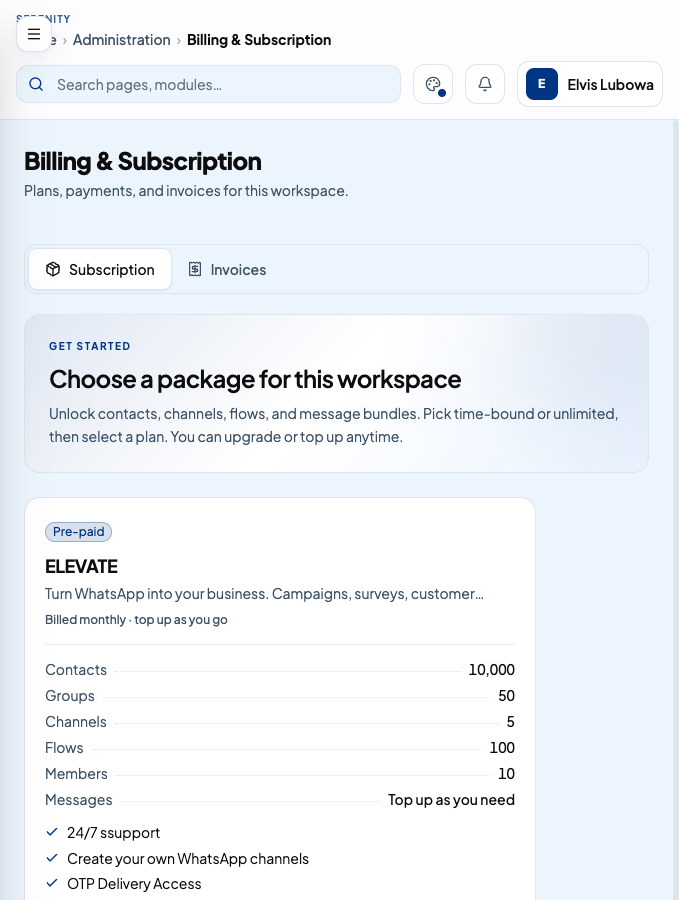
Subscription
The subscription tab shows the plan this workspace is on, what it includes, and how much of it you have used. Message prices follow the destination. A WhatsApp marketing message to one region is not the same balance as the same category sent to another region. You buy, and the workspace spends, the quantity for that destination.
Two ways of paying are in use.
- Prepaid. You buy a quantity up front. Sends draw that quantity down. If a renewal is missed, the balance stays on the account but cannot be used until you renew. After the grace period set by the platform, an unused lapsed balance is cleared. The grace length is not something you set on this page.
- Postpaid. Usage is metered through the period and billed on the invoice. You do not draw down a prepaid lot.
The first paid subscription can include free message credit. When that credit is waiting, a banner says your free credit is ready. Choose Assign, then put the credit on the categories and destinations you want. Anything you do not assign stays on the workspace as unallocated credit. You can add more in the same basket before you confirm.
Change or pick a plan
- 1On the Subscription tab, review the current plan.
- 2Choose another plan from the list when you want to switch.
- 3Confirm. If a payment is required, the payment step opens.
Pay an invoice
Invoices are in the account currency from Settings, USD or UGX. Open the Invoices tab, choose an invoice, and pay it. Two methods are offered when they are available for that invoice:
- Card. You complete the card checkout. A USD invoice is charged in dollars.
- Mobile money. You enter the mobile money details, review the quote, and approve the prompt on the phone. A USD invoice is converted to local currency at checkout. A UGX invoice is already in shillings.
A pending payment can be cancelled from the subscription view if you started one and need to stop it. Paid, issued, due, and overdue invoice emails include the invoice PDF.
Top up
When the plan allows a top-up, open the basket from the subscription tab. Pick a category and a destination, then a quantity. For example, marketing messages for Rest of Africa and marketing messages for India are separate lines. Confirm and pay. Each line becomes its own balance, and later sends to that destination use that balance.
Who can see this page